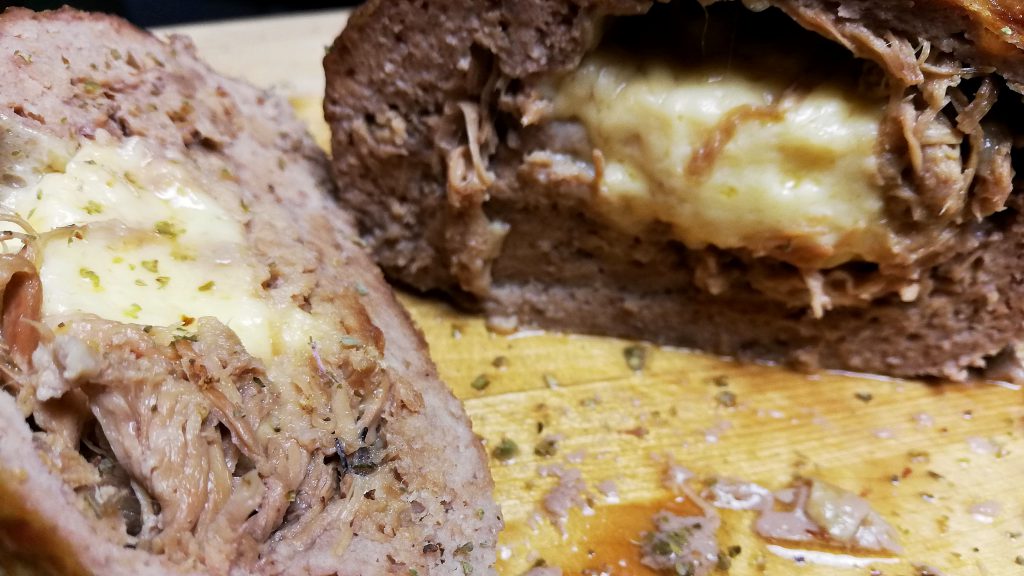
This stuffed meatloaf with pulled pork & cheese is a real meat monster. It takes a few hours of cooking time, but the waiting is definitely worth it. In addition, this meatloaf is delicious, extremely satiating and perfectly suitable for a ketogenic diet.
First, use the pork shoulder to make pulled pork. I used a stewing pan in which I seared the meat, then added some water and put the pan into the oven for about 6 hours, with the lid on. If you are not sure on how to prepare it, just use my easy and foolproof method for which you don't even need a stewing pan: Easy Pulled Pork Recipe
When the pork is about to be done, start to prepare the meat mixture. For that, put the ground beef, eggs & all seasonings into a bowl and mix everything thoroughly until it is a homogeneous mixture. You may use a food processor or simply mix it using your hands
In the meantime, preheat your oven to 150°C (300°F)
Take the pork out of the stewing pan / pot, remove all bones, pull the meat apart and keep it on a plate or in a bowl. Then, put a piece of cling film onto a cutting board. This helps to wrap the meatloaf up
Now, spread the meat mixture on the cling film, as evenly as possible
Afterwards, add the stuffings on top. Spread the pulled pork evenly and the cheese only on one half
Then, use the cling film to wrap everything up. Start on the cheese side first to make sure that the cheese will be completely wrapped up and can't leak out
When it is all wrapped up, put the loaf onto a baking tray with parchment paper and carefully remove the cling film
Finally, bake the meatloaf in the oven for about 1 hour
Recipe Notes
Of course, you may also use any other cheese you prefer, like mozzarella, parmesan or cheddar.
The pulled pork turns out great if you use pork neck instead of shoulder, too. It may be even better as pork neck usually is a little fattier then shoulder and therefore juicier & more flavorful.
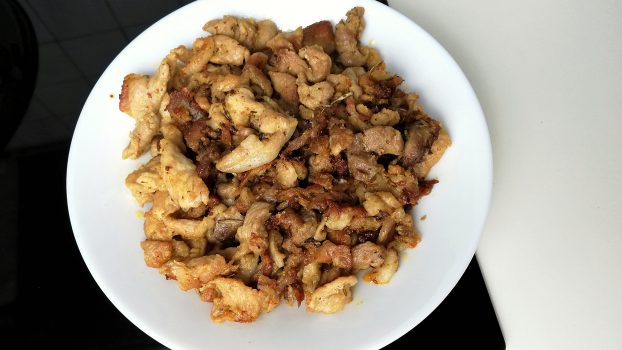
This keto gyro is simple to prepare and brings the typical, delicious greek flavor & smell into your kitchen. It's satiating and suitable for keto & low carb diets, especially low carb high protein or carnivorous ones. All it needs is a nice piece of fresh pork, seasonings and some fat for marinading & frying the meat.
0.5teaspoon(s)Cayenne pepperor other chili powder (optional)
Instructions
First, put the piece of pork ham into the freezer for 1.5 to 2 hours. You want it to be frozen, but still cuttable. This makes the next step very easy
When the meat is stiff, take it out of the freezer and cut it into thin slices
After that, put the sliced meat into a big bowl & add all seasonings. Just spread them on top of the meat
Now, melt the lard or coconut oil in the microwave for 20-30 seconds. If you are using heatable olive oil you don't need to melt it, of course.
Then, pour the fat onto the meat and immediately start to mix everything thoroughly
Afterwards, let the seasoned meat stand for about 10-15 minutes to give it a chance to soak in some seasoning. The longer you let it stand the better
Next, preheat a pan (with your preferred fat for frying) to low-medium heat. Add the meat and let it fry for about 5-10 minutes with a lid on
Finally, remove the lid and fry for another 5-10 minutes while stirring occasionally until you have some crispy bits and roasting flavors (browned meat). Take care that you don't fry it for too long as fresh pork ham is pretty tender and can dry out fast
Recipe Notes
To make it even better, you may prepare & marinade the meat in the morning or one day in advance and let it soak in the seasonings for a longer period of time. Simply let it stand for 1-2 hours or longer instead of 10-15 minutes. If you prepare it a day in advance, put the bowl into your fridge and cover it with cling film.
The seasonings are amazing for marinading pork chops or spice up some ground beef, too.
In addition, you could use pork loin instead of ham or try it with other cuts.
Serve with any keto friendly side dish you like, e.g. salad, fried / baked vegetables, some eggs or simply a low carb condiment.
Now, cut the big piece of cheese into small dices and bits
Then, put baking paper onto a baking tray and scatter the cheese bits on it. Remember to leave big enough gaps between the pieces
Afterwards, slide the baking tray into the oven and bake the cheese for 60-90 minutes in order to dry it. This time period may vary, depending on your oven and the type of cheese you use. If your oven doesn't have ventilation or if its thermostat isn't that accurate, I recommend to open the door about every 10 minutes or leave it opened with a small gap during the drying process
Always have an eye on the cheese, look after it every 10-15 minutes. In case it starts melting too much, open your oven's door to let evaporated water and some heat out. Also, the cheese should continuously decrease the amount of bubbles that it throws (evaporating water)
When almost all the water has evaporated from the cheese (no more bubbling), you can turn the heat up to 140-150°C (285-300°F) to make the cheese popping and give it some crisp
Afterwards, simply take out the baking tray and let the popped cheese cool down for a few minutes
Recipe Notes
I had no instructions for these so I thought, I'd just figure it out on my own.
You need to evaporate the water from the cheese, therefore a temperature of about 100°C -or right below it- is needed. This way, the water evaporates, without the cheese melting too much.