Chicken Heart Tuna Meatballs – With Oven Baked Broccoli

Chicken Heart Tuna Meatballs

Print Recipe
Chicken Heart Tuna Meatballs - With Oven Baked Broccoli
These chicken heart tuna meatballs are a delicious and extremely nutritious alternative to standard meatballs with ground beef. This preparation method is a great way to disguise the chicken hearts and get yourself and potentially your children, too, to eat this healthy meat if you are not familiar with it yet.
Chicken Heart Tuna Meatballs
Prep Time 5 minutes
Cook Time 25 minutes
Servings
Change Units
Ingredients
Meatball Mixture
Seasonings
Broccoli
Prep Time 5 minutes
Cook Time 25 minutes
Servings
Change Units
Ingredients
Meatball Mixture
Seasonings
Broccoli
Chicken Heart Tuna Meatballs
Instructions
Meatballs
  1. First, mince the chicken hearts and onion in a food processor for about 10 seconds on a high speed
  2. Next, add the remaining ingredients for the meatballs, including seasonings and mince for another 20-30 seconds until it is a homogenous mixture
  3. Preheat a pan with about 30 gram coconut oil, lard or whatever you prefer to medium heat
  4. Use a tablespoon and your other hand to form the meatballs from the mixture and place them in the pan
    Chicken Heart Tuna Meatballs in Pan
  5. Turn down the heat to low, put a lid on the pan and fry the meatballs slowly for about 10 minutes, until they start to become solid on the top, too
  6. Now, you can flip and slowly fry them with the lid on for another 5-10 minutes
  7. Finally, set the heat to medium-high and fry the meatballs as evenly as possible from all sides, for about 5 minutes, in order to get a nice brown colour and roasting flavors
Broccoli
  1. While the meatballs are frying, you can easily prepare some oven baked broccoli as a side dish. First, set your oven to 180°C-200°C.
  2. Put the broccoli on a baking tray which goes into the oven. After 5-10 minutes, the broccoli should be thawed and you can sprinkle some salt on top.
  3. Finally, bake it for another 20-25 minutes until it starts to become dark brown on the top and has a slight crispiness.
Recipe Notes

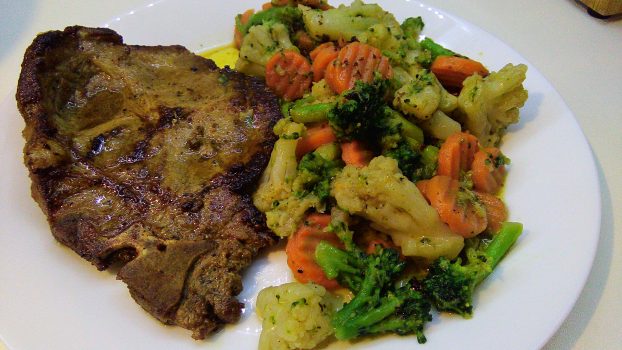
As you can see on the picture I made a creamy sauce to go with everything, too. If you want to know how to make it check out this asparagus cream sauce recipe.

There is no Nutrition Label for this recipe yet.

These nutrition facts only include the meatballs.


Spicy Lemon Marinated Pork Chop – With Buttered Vegetables

Spicy Lemon Marinated Pork Chop

Print Recipe
Spicy Lemon Marinated Pork Chop - With Buttered Vegetables
This spicy lemon marinated pork chop is very easy to cook and tastes delicious. The marinade consists of olive oil, lemon juice, tamari sauce and sichuan pepper among some other spices. Perfect for a barbecue or just frying the meat in a pan.
Spicy Lemon Marinated Pork Chop
Prep Time 5 minutes
Cook Time 25 minutes
Passive Time 12-24 hours
Servings
Change Units
Ingredients
Marinated Pork
Buttered Vegetables
Prep Time 5 minutes
Cook Time 25 minutes
Passive Time 12-24 hours
Servings
Change Units
Ingredients
Marinated Pork
Buttered Vegetables
Spicy Lemon Marinated Pork Chop
Instructions
Marinated Pork
  1. First, you need to prepare the marinated pork about 12-24 hours before you want to cook it. Optimally, you do this the previous evening if possible
  2. Put the pork chops into a zip lock bag or a container and add all the ingredients for the marinade.
    Marinating Spicy Lemon Pork Chop
  3. Massage everything into the meat and store it in the fridge for 12-24 hours. Always close your zip lock bag or container thoroughly before putting it into the fridge
  4. When this waiting period is over, preheat your pan with some lard or coconut oil in it to medium heat
  5. Finally, fry your pork chops for 5-7 minutes on each side until they get a nice brown color
Buttered Vegetables
  1. Before you put the pork chops into the pan, thaw the vegetables in the microwave or just throw them into a pot with just about 50 milliliter of water
  2. Then, add the butter and seasonings, put the lid on and let it cook for about 15 minutes at low-medium heat while stiring occasionally
  3. Now, the pork chops and vegetables should be both finished and you may pour some of the grease from the pan over the vegetables
Recipe Notes

Never pour raw, leftover marinade over the cooked meat.

If you want to use the leftover marinade, make sure to boil it up to kill all harmful bacteria.

Don't marinate in aluminum containers or foil, because a chemical reaction could spoil the food.

The best way to marinate the meat is using the zip lock bag in order for it to be evenly surrounded by the marinade.

For 500 gram of meat, you need about half a cup of marinade.

There is no Nutrition Label for this recipe yet.

Watch on YouTube:


Chocolate Nut Butter Fatbombs – With Fluffy Whipped Cream

Chocolate Nut Butter And Fluffy Whipped Cream Fatbombs

Print Recipe
Chocolate Nut Butter Fatbombs - With Fluffy Whipped Cream
These chocolate nut butter fatbombs taste heavenly and serve as an awesome ketogenic snack or dessert. The nut butter is made with different types of nuts and the fluffy whipped cream makes these fatbombs even better.
Chocolate Nut Butter And Fluffy Whipped Cream Fatbombs
Prep Time 30 minutes
Passive Time 1 hour
Servings
batch
Change Units
Ingredients
Chocolate nut butter
Fluffy whipped cream
Prep Time 30 minutes
Passive Time 1 hour
Servings
batch
Change Units
Ingredients
Chocolate nut butter
Fluffy whipped cream
Chocolate Nut Butter And Fluffy Whipped Cream Fatbombs
Instructions
Chocolate nut butter
  1. Put all ingredients for the chocolate nut butter into your food processor and make a nut butter with them
    Chocolate Nut Butter Ingredients
  2. If you don't know how to make nut butter, have a look at my almond butter recipe
Fluffy whipped cream
  1. Pour the cream into a bowl and whip it
  2. Next, add the cream cheese and whip it again -carefully, at a low speed of rotation- for about 30 seconds
Final Steps
  1. Fill some molds with layers of the chocolate nut butter and fluffy whipped cream
    Chocolate Nut Butter Fatbombs - Ready To Fill Molds
  2. Feel free to be creative about how many layers you want to do, if at all
    Chocolate Nut Butter Fatbombs - Filled Molds
  3. Finally, put the molds into the freezer for at least 1 hour
Recipe Notes

The chocolate nut butter and fluffy whipped cream for these fatbombs already taste good on their own and may also be filled into molds without layering.

There is no Nutrition Label for this recipe yet.