4 Hours Bolognese – Extra Fatty

Bolognese

Print Recipe
4 Hours Bolognese - Extra Fatty
This bolognese with its 4 hours of cooking time is really worth the waiting. It is very delicious and will get you saturated fast due to its extra fat. The recipe itself is pretty simple and you may vary with the amount of cream and butter. How about giving it a try with coconut oil?
Bolognese
Prep Time 10 minutes
Cook Time 4-5 hours
Servings
Change Units
Ingredients
Prep Time 10 minutes
Cook Time 4-5 hours
Servings
Change Units
Ingredients
Bolognese
Instructions
  1. Fry ground beef and onions in a big-sized pot at mid-high heat
  2. When everything becomes crispy, add garlic and fry for a few minutes
  3. Put in all tomato-related ingredients & water
  4. Stir well, then add the remaining ingredients & seasonings
  5. It's time to let it simmer for 3-5 hours. The tomato pieces will dissolve all the way
Recipe Notes

Fresh basil greatly enhances the flavour of this dish. If you want to use it, put in some minced basil at step 2 or near the end of your cooking time.

If you are craving for noodles as a side dish, you could make shirataki noodles or zucchini noodles (zoodles).
Of course, grated parmesan cheese fits very well, too.

There is no Nutrition Label for this recipe yet.

Watch on YouTube:


Fried “Chegg” -Merged Cheese & Eggs- On Pork Chop

Print Recipe
Fried "Chegg" -Merged Cheese & Eggs- On Pork Chop
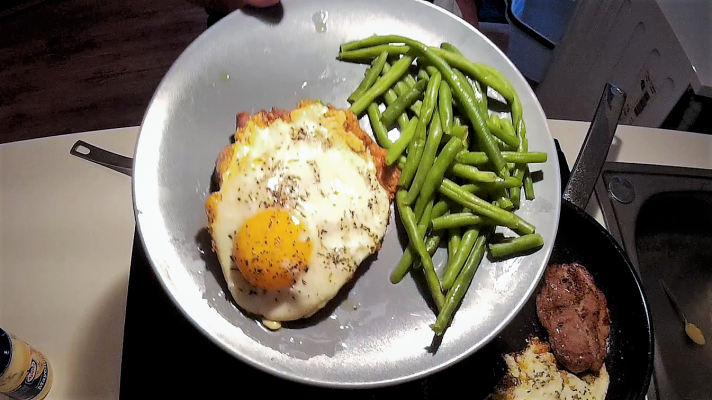
Bring on delicious! This fusion of cheddar cheese and eggs on top of pork chop with a simple sauce always makes me drooling. I call these fried, merged cheese and eggs a "chegg". Its bottom is as crispy as can be.
Prep Time 5 minutes
Cook Time 15 minutes
Servings
Change Units
Ingredients
Sauce
Seasonings
Prep Time 5 minutes
Cook Time 15 minutes
Servings
Change Units
Ingredients
Sauce
Seasonings
Instructions
  1. Cook needle beans
  2. In the meanwhile, fry the pork chop with clarified butter until it has a nice brown color
  3. When the pork is nearly done, put cheese into the pan
  4. Once the cheese forms bubbles, put one egg per slice on top of it
  5. Fry, until chegg is crispy
  6. Put sauce on the pork and the chegg on top of that
Sauce
  1. Mix everything in a small bowl
Recipe Notes

You may also just cook some cheggs and leave out the pork chop and the sauce. Broccoli or spinach also go very well with this dish instead of needle beans.

To the sauce, you can add some MCT oil or use seasonings like chili or paprika, if you like that.

There is no Nutrition Label for this recipe yet.

Watch on YouTube:


Baked Stuffed Mushrooms & Creamed Leeks

Stuffed Mushrooms

Print Recipe
Baked Stuffed Mushrooms & Creamed Leeks
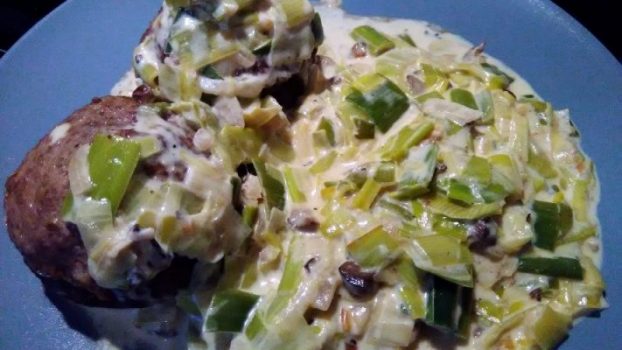
Try out this delicious recipe. The stuffed mushrooms can also be upgraded by putting grated cheese on them, or even shape meatballs with cheese in the middle to fill the mushrooms. In addition, they go very well with the creamed leeks. All in all, a very tasty meal, fueled with healthy fats.
Stuffed Mushrooms
Prep Time 10 minutes
Cook Time 45 minutes
Servings
Change Units
Ingredients
Creamed leeks
Prep Time 10 minutes
Cook Time 45 minutes
Servings
Change Units
Ingredients
Creamed leeks
Stuffed Mushrooms
Instructions
Mushrooms
  1. Preheat oven to 180°C
  2. Hollow out mushrooms and place them on a baking tray with the open side to the top (keep the stems)
  3. Put ground beef in a mid-sized bowl, add salt, pepper, caraway and cream cheese
  4. Mix everything thoroughly
  5. Then, stuff the mushrooms with the mixture
  6. Melt some ghee in a small microwave-suitable bowl and spread it on top of the mushrooms
  7. Put mushrooms into the oven for about 40 minutes
Creamed leeks
  1. Slice the leftover mushroom stems and fry them at medium heat in a mid-sized pot
  2. After 3 minutes, add onions and fry until they become brown and crispy
  3. Now, add leeks & some water
  4. Let it simmer with the lid on at low-mid heat for 10-15 minutes
  5. Add cream cheese & cream
  6. Season with salt, pepper, grated nutmeg
  7. Stir everything and let it simmer for 5-10 minutes at low-mid heat, this time without lid

There is no Nutrition Label for this recipe yet.

Watch on YouTube: